

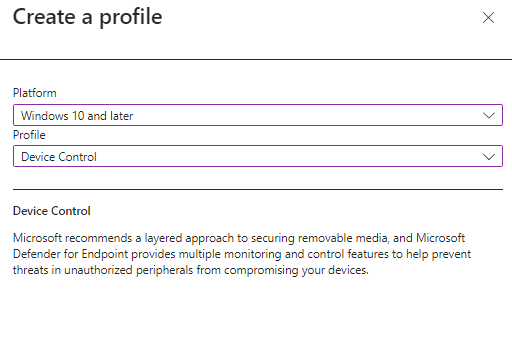
Introduction
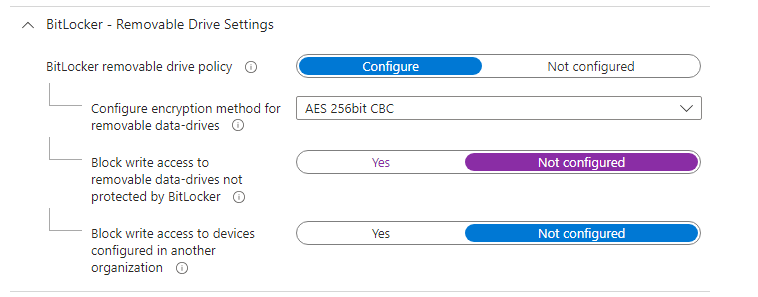
One day, a client approached us with a pressing issue. They needed to configure specific OT devices using a USB stick, but were unable to do so due to a policy we had set for Disk Encryption (Bitlocker). This policy blocked write access to removable data-drives that were not protected by Bitlocker. Unfortunately, their use case required preparing the USB stick on one computer and then transferring it to another. This posed a problem as they were forced to encrypt the Bitlocker key on the source computer, rendering it unusable on the target computer.
To address this challenge, I explored the Removable Storage Access Control policies. After careful consideration, I devised a solution by creating a customized policy for these devices that required the creation of USB sticks. I duplicated the existing Bitlocker policy but modified the “Block write access to removable data-drives not protected by Bitlocker” setting to ‘Not configured’.
To maintain the security of these devices, I implemented a measure to restrict the use of any removable device except for the specific model required to create their desired deployments. This ensured that while they could still configure the OT devices using the prepared USB stick, unauthorized devices would be blocked.
Configure Reusable Settings
To facilitate the identification and allowance of specific USB sticks in this scenario, we need to create two reusable settings.
All Removable Devices
- Navigate to Endpoint Security > Attack Surface Reduction > Reusable Settings.
- Create the first reusable setting named “All Removable Devices” to encompass all removable storage, including Windows portable devices, and optionally CDs/DVDs.
- Create two records for this setting:
- “All the removable devices” identified by configuring the PrimaryId as “RemovableMediaDevices”
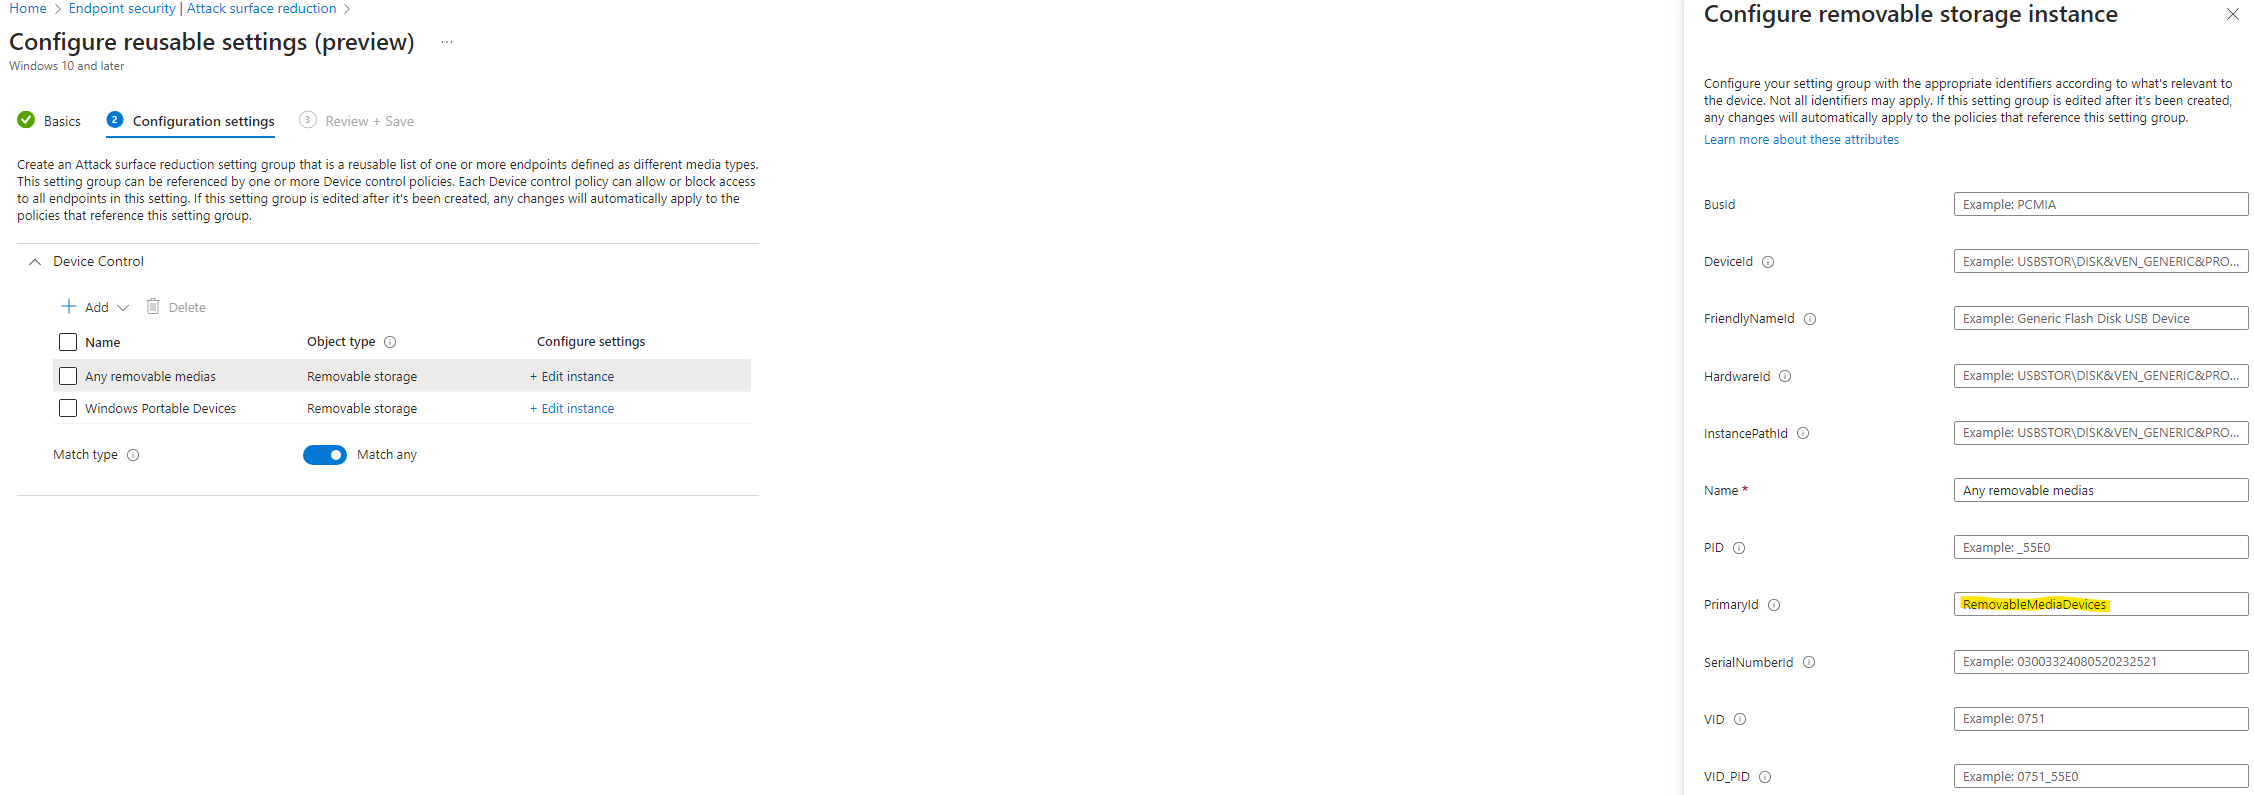
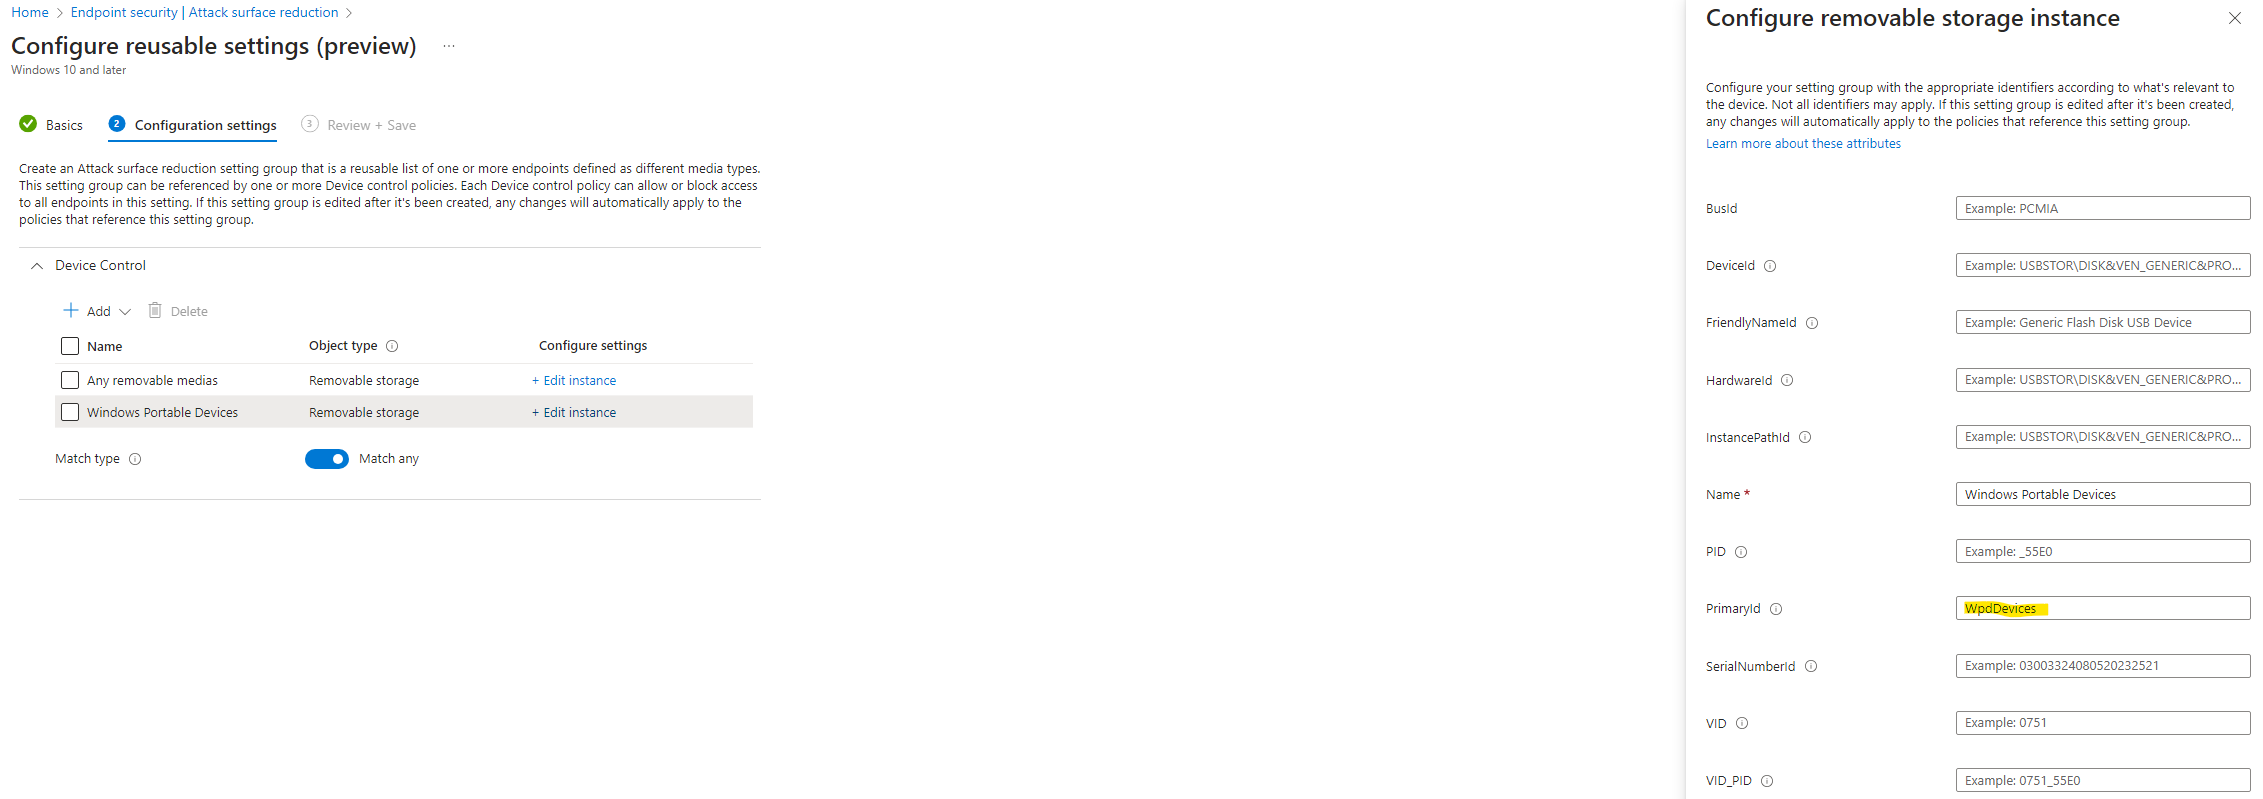
- “Windows Portable Devices” identified by configuring the PrimaryId as “WpdDevices”
- “All the removable devices” identified by configuring the PrimaryId as “RemovableMediaDevices”
- Set the Match type to ‘Match any’.
Specific USB Model
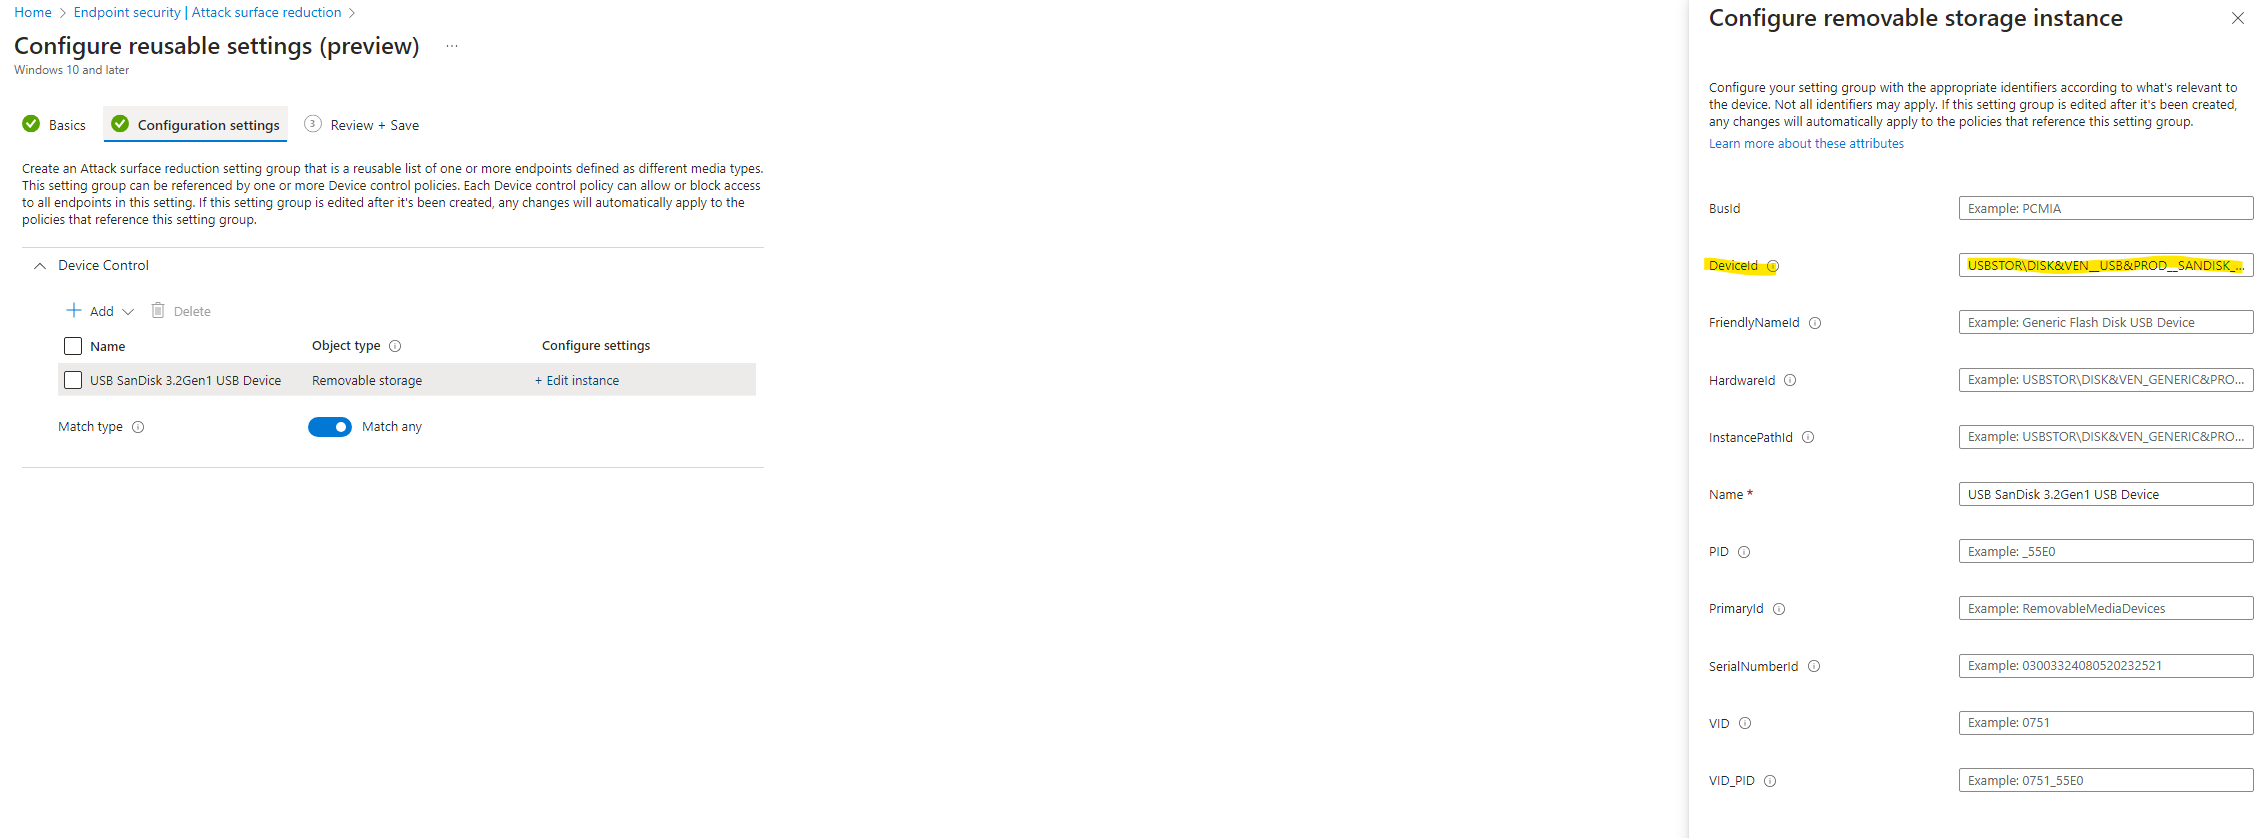
For the second reusable setting, we will identify a specific USB drive, which in this case is a “SanDisk 3.2Gen1 USB”.
- Obtain the Device instance path by connecting the USB to a Windows device and navigating to Device Manager > Disk drives > your USB device > Properties > Details > Device instance path

- Copy the part of the Device instance path before the '\' to identify the specific model, excluding the specific device. You could instead of the instance path also use the HardwareId to scope on the model of your usb stick.

- Create the following record:
- ”«Your USB name»” identified by configuring the DeviceId with the instance path you found, excluding anything after the last '\' (see image above).
- ”«Your USB name»” identified by configuring the DeviceId with the instance path you found, excluding anything after the last '\' (see image above).
By implementing these reusable settings, you’ll have a clear way to identify and manage removable devices, ensuring the necessary configurations are in place.
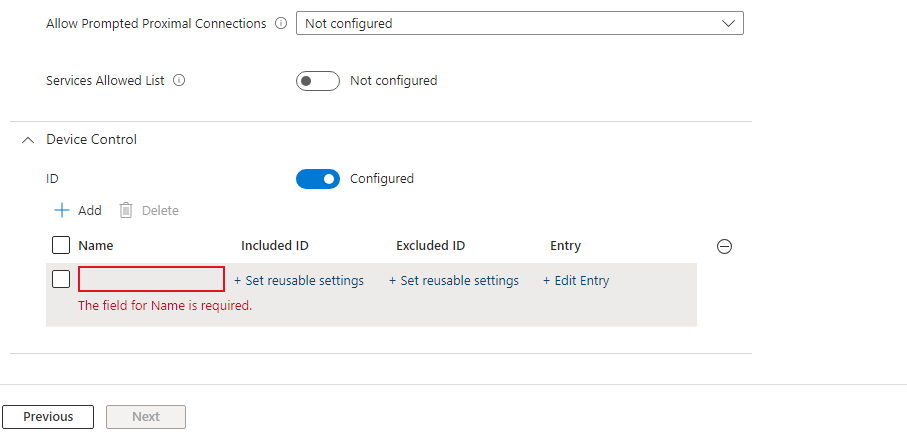
Configure ASR Device Control
Once you have successfully configured both reusable settings, you’re ready to put them into action. Navigate to “Endpoint Security” and select “Attack Surface Reduction”. There you can create a new Device Control policy.
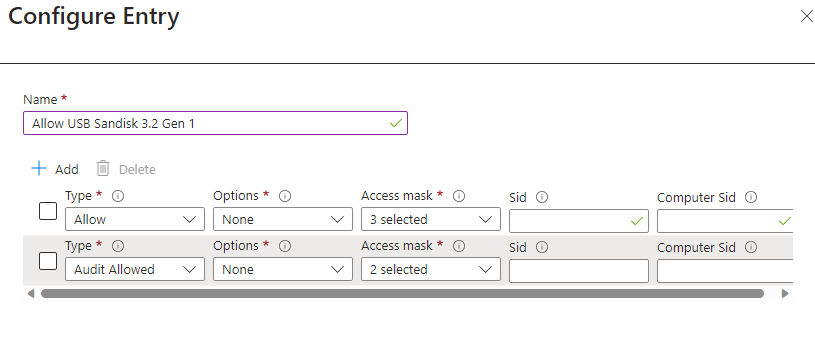
To begin, let’s configure the USB device for the desired read/write access permissions. Follow these steps:
Included ID: Utilize the reusable setting that was established for your particular USB device. In my instance, this corresponds to the ‘USB Sandisk 3.2 Gen 1’.
Excluded ID: /
Entry:
Moving on to the second record, we will generate a ‘Deny’ entry that encompasses all removable drives, excluding our designated USB device.
Included ID: Employ the reusable setting designated for ‘All Removable Devices’.
Excluded ID: Utilize the reusable setting formulated for your unique USB device. In my scenario, this corresponds to the ‘USB Sandisk 3.2 Gen 1’.
Entry:
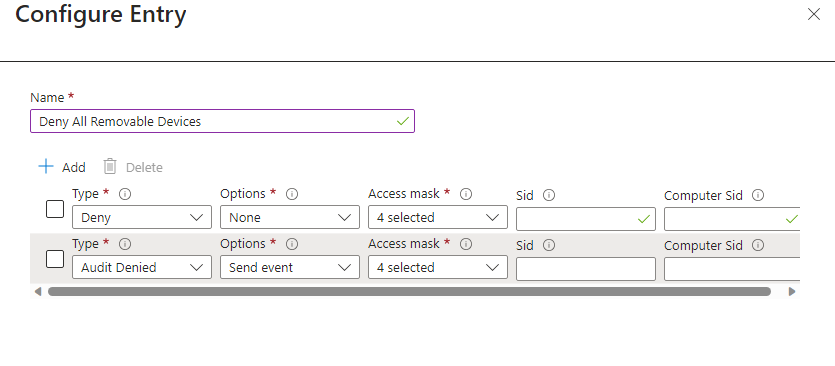
As you can see on the images above, I have introduced a second entry dedicated to auditing permitted or denied events. These will be added to ensure we can audit our configuration later on.
With both entries accurately configured, the next step involves assigning the policy to a designated group. Carefully review the settings before finalizing and saving the configuration.
Confirm Policy Implementation
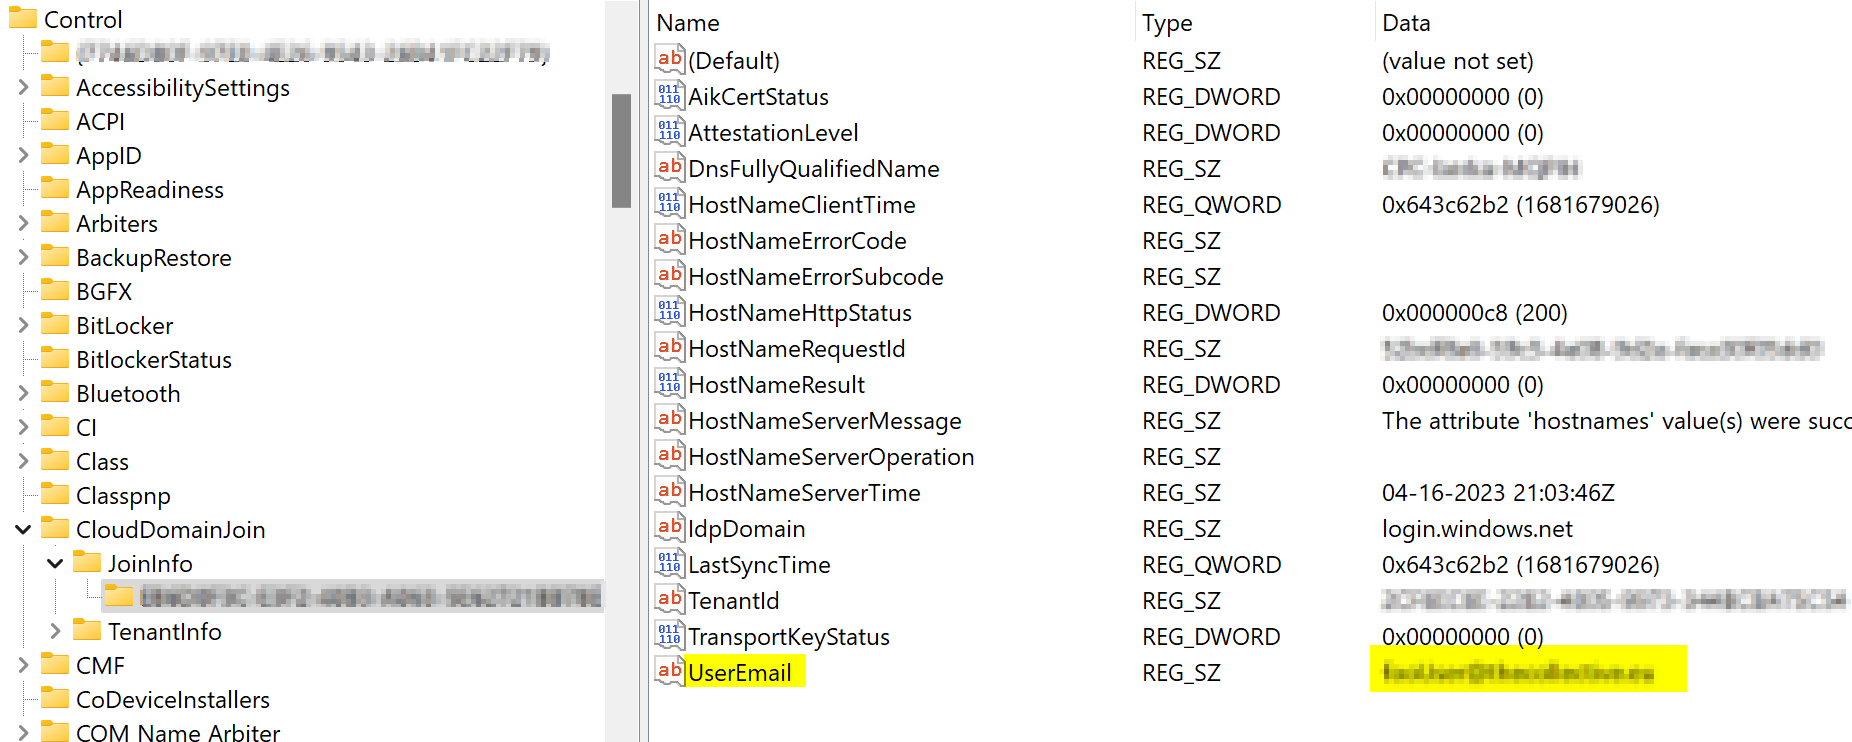
To ensure the accuracy of our configured settings, you can verify their implementation by navigating to the registry at the following location:
HKLM:\Software\Policies\Microsoft\Windows Defender\Policy Manager

Here you can see the 2 registry keys: PolicyGroups and PolicyRules.
- The PolicyGroups shows you the reusable settings we configured earlier.
- The PolicyRules shows the Device Control settings that allows or denies the removable devices.
While delving deep into the intricacies of XML construction is beyond the scope here, it’s crucial to comprehend if you opt for OMA-URI implementation.
A frequent stumbling block for the rules not taking effect is often the absence of the necessary minimum version for the anti-malware client, specifically version 4.18.2103.3 or later. We can verify this using following Powershell command:
Get-MpComputerStatus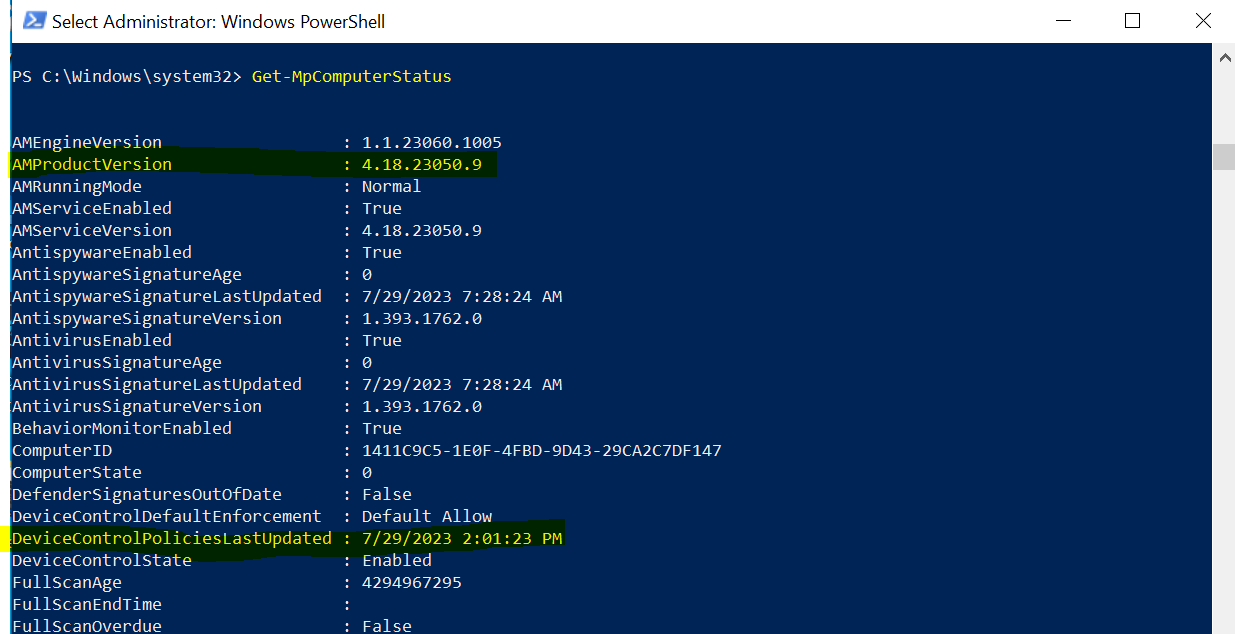
Here you will have to check the AMProductVersion. You can also check the DeviceControlPoliciesLastUpdated property to validate your policies landed.
If the policy is still not landing make sure to reboot the device.
Experience
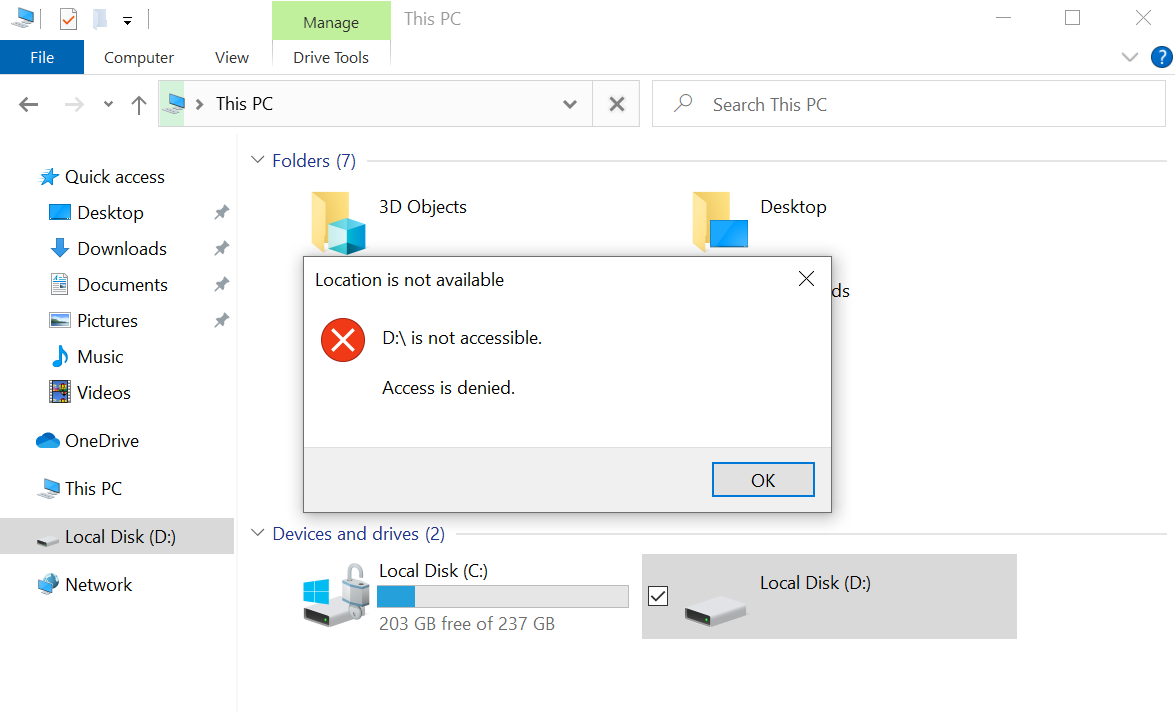
With the confidence that our policy has been successfully implemented, it’s time to put it to the test!
As an experiment, when I insert a USB or external drive that isn’t the specifically permitted USB device, we will get following popup and toast notification. It’s worth noting that the toast notification only makes an appearance if enabled within the rules. Of course, you have the option to toggle their visibility as per your preference.

Auditing
Leveraging the Advanced Hunting tab within Microsoft Defender for Endpoint opens the door to closely monitor potential blocked removable devices, giving you the opportunity to fine-tune your reusable settings if needed.
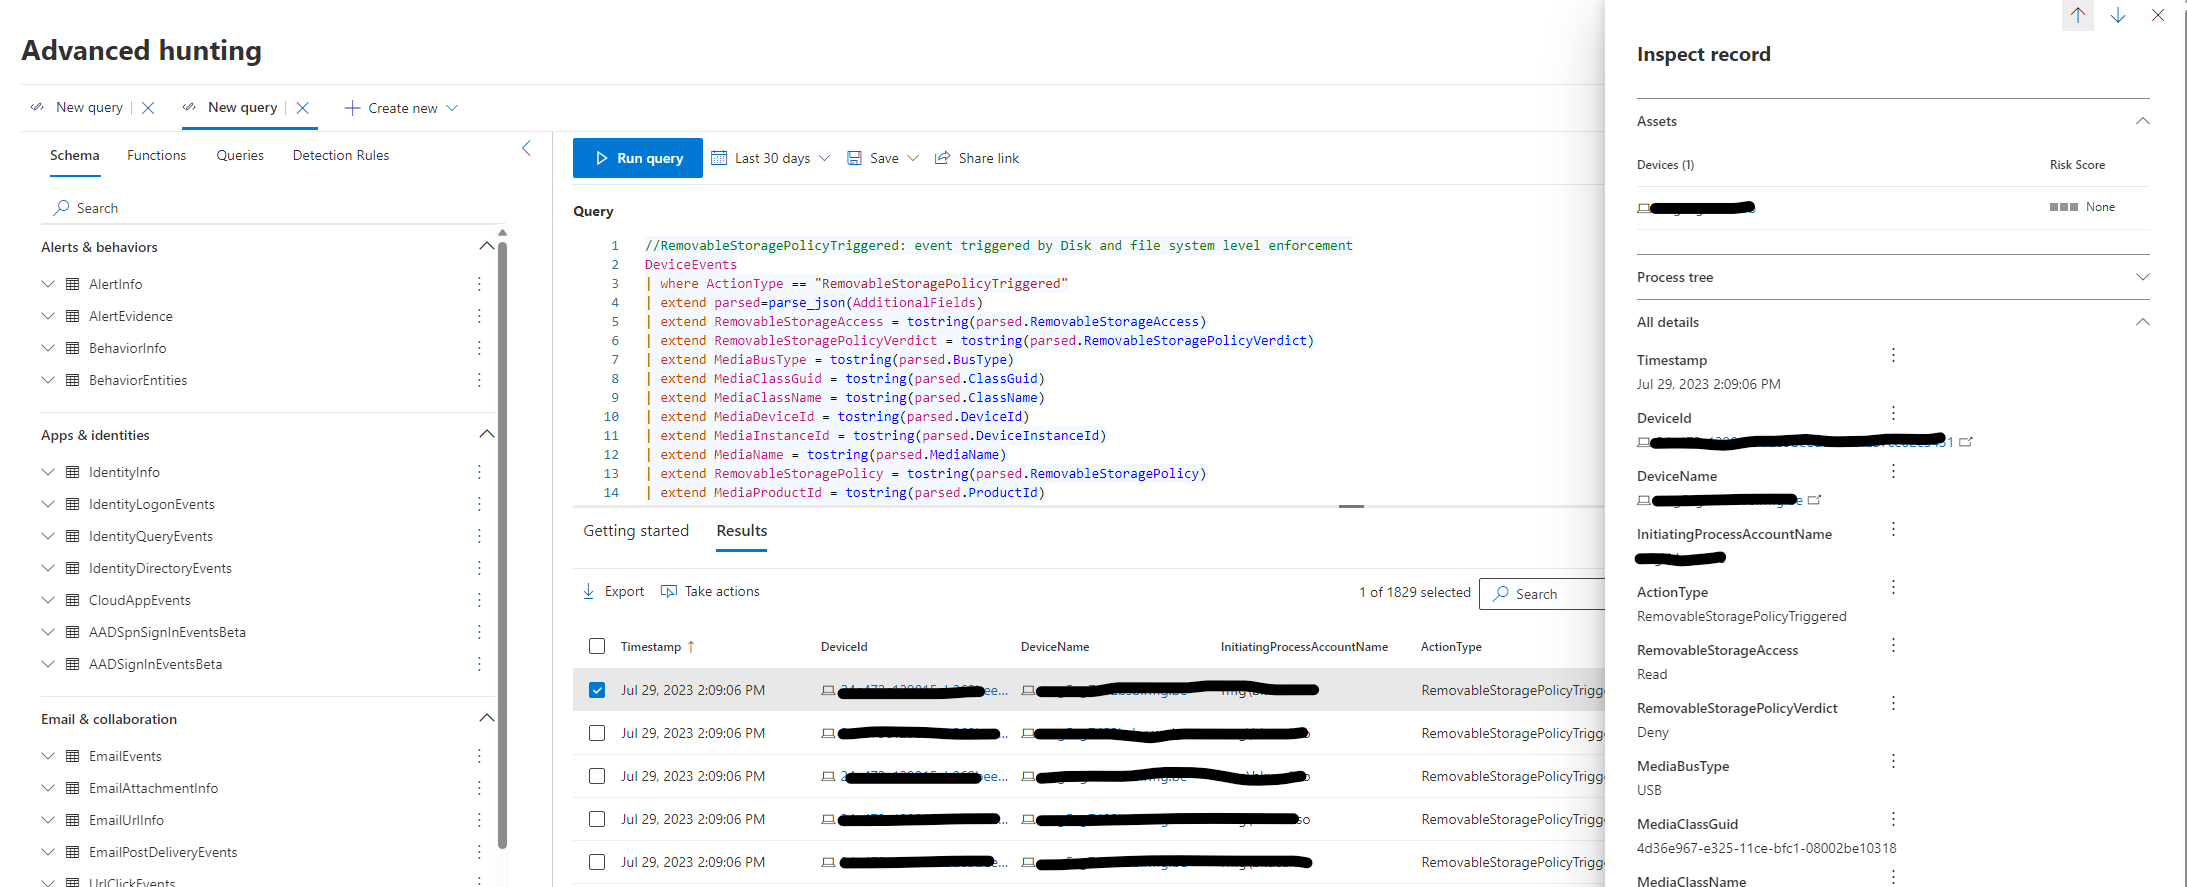
More information here.
Conculsion
That’s it for this blog. I’m really hoping that these steps make implementing this configuration a breeze for all of you. If you guys have any questions, put a comment, send me a private message, whatever works best for you. Happy testing!